How To Create A Storyboard For An Animated Video?
Table of Contents
If you hire a video animator or an animation studio to create an explainer video, they will need to have a storyboard with your script in order to know what details to produce in your animation. Often times, animators and studios can help you take your idea or your script and turn it into a storyboard – but if you want to take on that part of creating an animated video, this article will explain how to create a storyboard for an animated video, even if you have no artistic abilities.
Learn how to create a storyboard.
If you have a question about how to create a storyboard that isn’t answered in this article, you can use our contact form to ask your question or click the image below to with a member of our production team:

What is a storyboard?
But first, what is a storyboard? A storyboard is a document that includes text and visuals to explain two things:
1). What art do the designers need to create?
2). How should the animators make the custom designed art move around?
How do you create a storyboard for an animated video?
Each page of a storyboard has four parts and you should include all of them when you make the storyboard for your animated video:
1). Script
2). Sketch/Mockup
3). Direction
4). Asset List
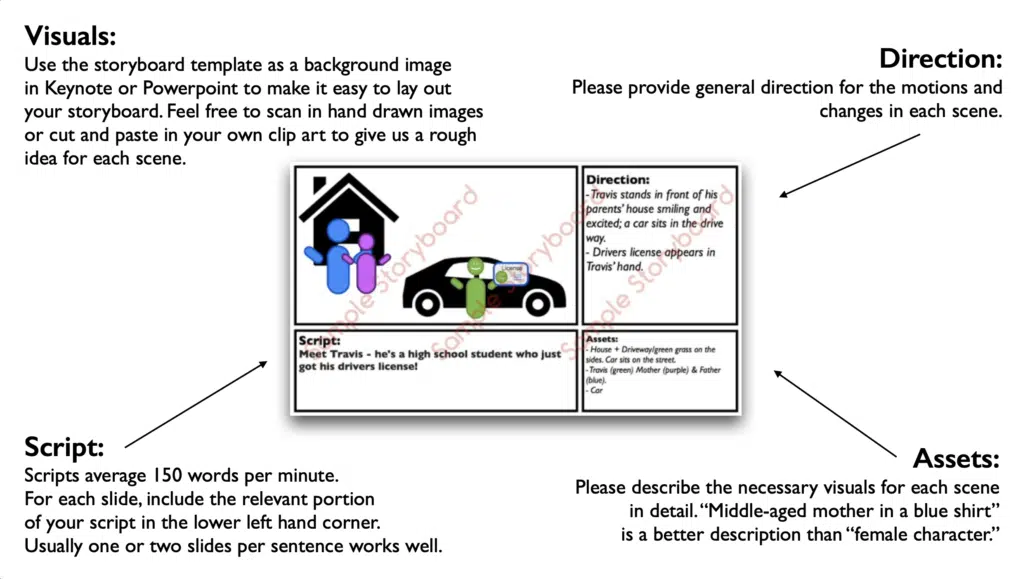
Download Video Igniter’s Free Storyboard Template
1). Script
When you first start making the storyboard for your animation, begin by taking each sentence from your script and put one sentence on each page of your storyboard. It’s possible that when you create your storyboard, you may find that it makes sense to break up a sentence over multiple slides because there’s a lot of motion and design information to explain to the animators. Alternatively if a sentence needs multiple slides to explain all the motion design, have the full sentence on each page and highlight the active part of the sentence by making that part of the sentence bold.
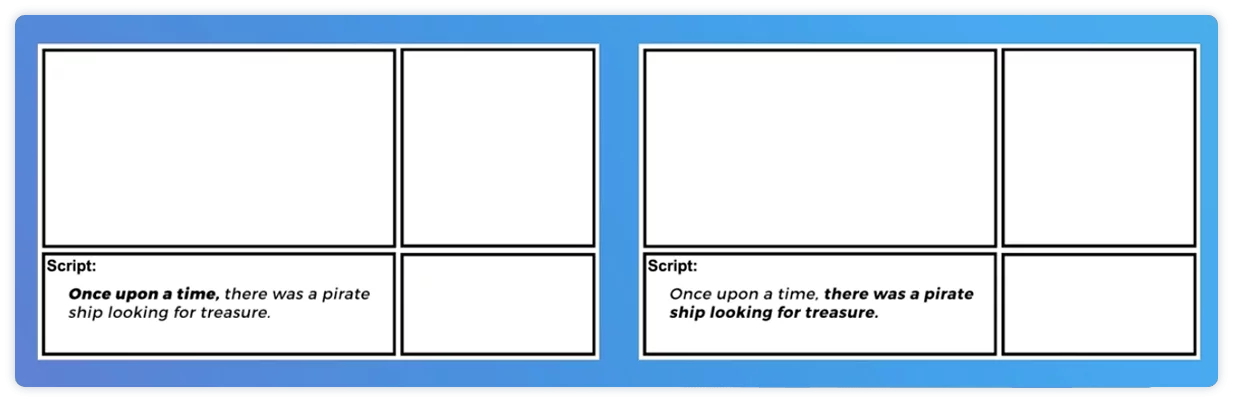
If a scene has a lot of detail, split the sentence into multiple slides.

2). Sketch/Mockup
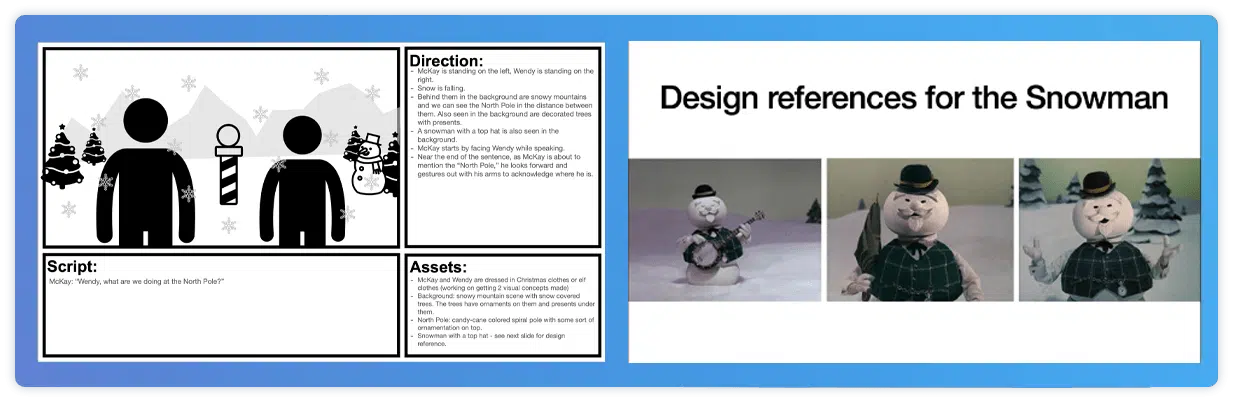
Each slide of your storyboard should contain a mockup of the scene that is going to be designed for each sentence of the script. Your sketch or mockup doesn’t have to look professional – it just has to be adequate enough to communicate your idea. It’s our job to take your ideas and turn it into something real. Stick figure sketches are perfectly fine – a simple sketch on paper goes a long way – just take a photo of it and include it on the appropriate page of your storyboard.
Too timid to try sketching out your ideas? Use freely available images and icons online to create a rough mockup of the scene you want us to design.
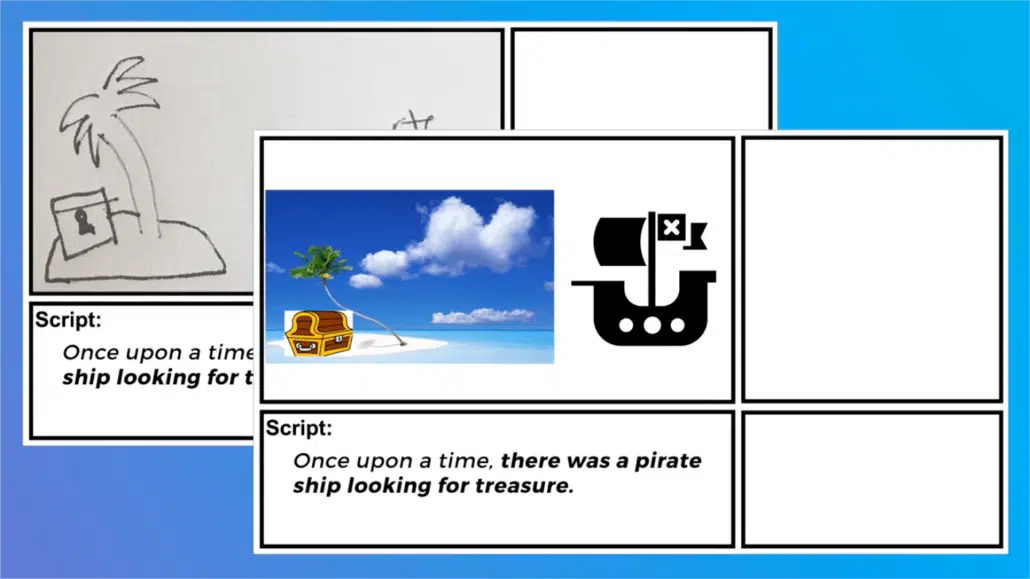
Examples Of Storyboards For Animated Videos That Were Created Using Sketches Or Icons And Clipart.
3). Direction
This is the most important part of creating a storyboard – use simple language to clearly explain what sort of motion design you want to happen during this part of the script. The more you can break down your ideas, the easier it will be for the animators to understand what they are going to animate. Simple language with bullet points is the best way to sequentially document the order of operations that needs to happen in a scene.
If you want an action to happen at a specific moment during the voiceover, it helps to say something like, “when the voiceover says, ‘____,’ do this _______.”
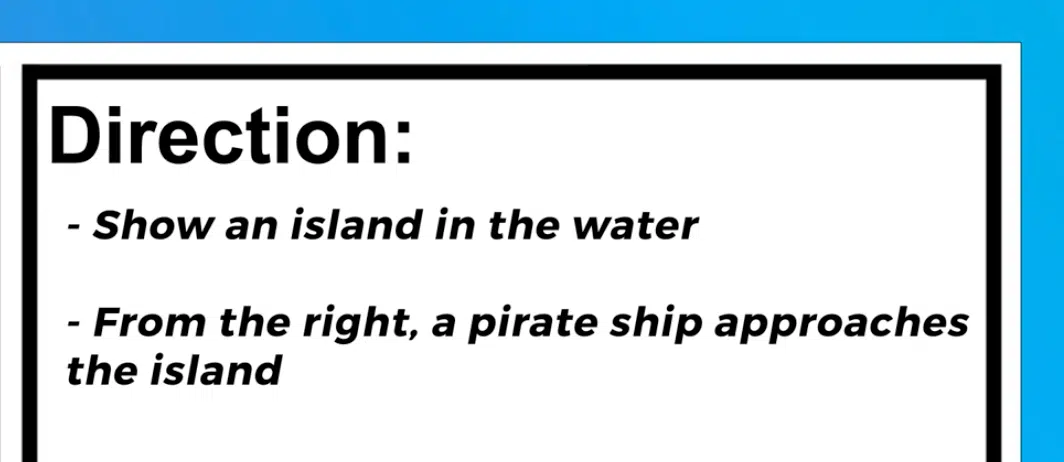
Use the upper right corner of the storyboard to explain to the animator what motion happens in the scene.
4). Asset list
In the bottom right corner of the storyboard, include a list of all the assets that are needed for that scene. Below are examples of some of the kinds of assets you should include in your list:
Scene Examples: blue bedroom, snowy mountain scene, busy shopping mall.
Characters Examples: old fireman in uniform with a white beard, a zebra with white and blue stripes.
Object Examples: digital alarm clock, an orange android phone.
Stock Footage Examples: video of a bumblebee, picture of the inside of a plant cell.
Audio Examples: cash register noise, glass shatter SFX.
5). Extra notes (Screenshots & Examples)
While you create your storyboard, you may find that it’s helpful to include additional information to explain the ideas in your storyboard. Feel free to insert additional slides that include extra descriptive or visual information for the animators and designers to reference when creating your video.
For example – maybe there are a few different styles of desks that you would like to see in a scene. You could include one in the mockup in a slide for your storyboard, and then on the slide after that, include 3 photos of other styles of desks the designers could use as a visual reference for the scene. Or, perhaps you want a character to walk a specific way in a scene and you found a YouTube video of a guy that perfectly demonstrates the type of motion you want to see conveyed in your animation – including a link to the video for the animators to watch will be very helpful for them.
Deep Dive: Want to learn more about the animated video production process? Check out this companion article to learn “How To Create An Animated Video.”
Download Our Free Storyboard Template
We have a storyboard template that you can use to create your storyboard in PowerPoint, Pages, or Slides. Click here to download our free storyboard templates and get our quick storyboard DIY guide too.
Animated Video Storyboard Examples
Interested in checking out some storyboards that were created for real animated video projects? Take a look at our explainer video storyboard examples.
Want Help Creating Your Storyboard?
Creating a storyboard is a fun creative process that turns your words into a visual story. That being said, we know it can be a challenging creative exercise and it’s not for everyone. If you want someone to create the storyboard for your animated video, just let us know and we’ll take care of it for you!

Tools To Help You Create Your Storyboard
We love an old fashioned hand-drawn storyboard – but there’s a growing number of digital tools out there that speed up the storyboard creation process. Let’s explore a few options to help you speed up and streamline the storyboard creation process.
Digital Storyboard Apps
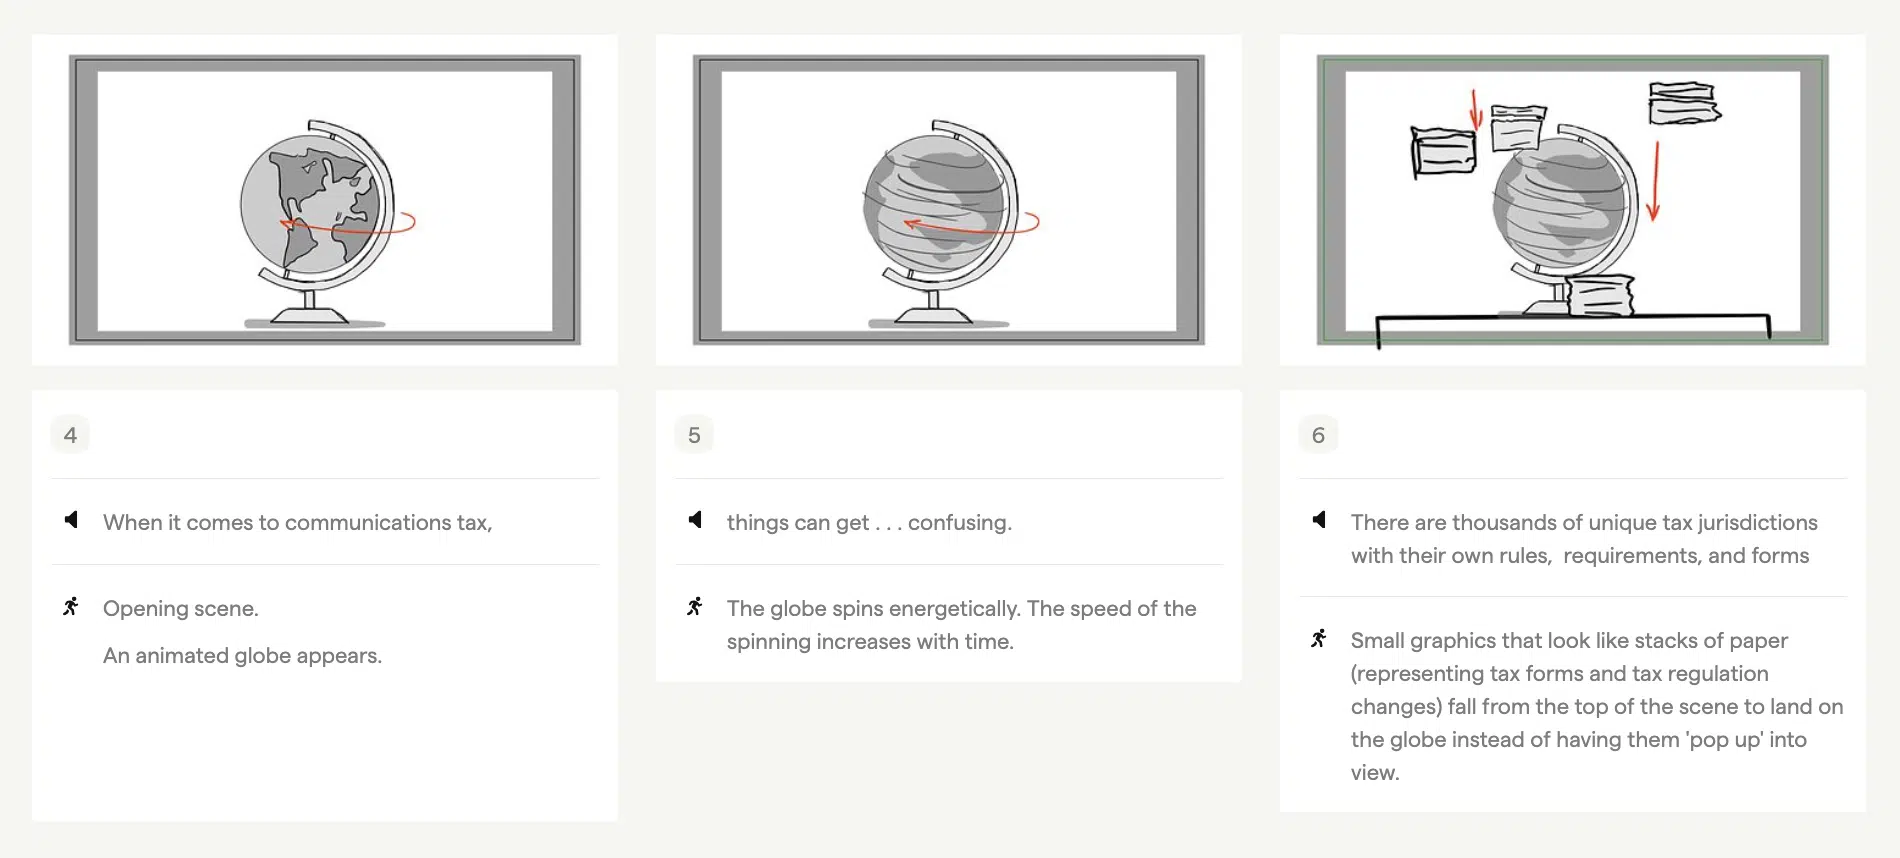
Boords is one of our favorite apps we use to create and share storyboards with our clients. After you upload your storyboard images to Boords, the app provides spaces for you to type in the script and the direction for the motion design which keeps your storyboard organized and nicely formatted.
Boords also makes it easy for clients to add their comments directly on each slide of the storyboard so we know what parts to update and revise.
Digital Sketching Devices
The old way of making a storyboard was to hand draw each scene, take a photo of it, transfer it to your computer and then format the image to fit within your storyboard. Now a days, it’s becoming more common to use an iPad or a Remarkable tablet to sketch each scene and then digitally add the image into your storyboard. This saves on time and makes it easier to update the sketches based on client feedback.
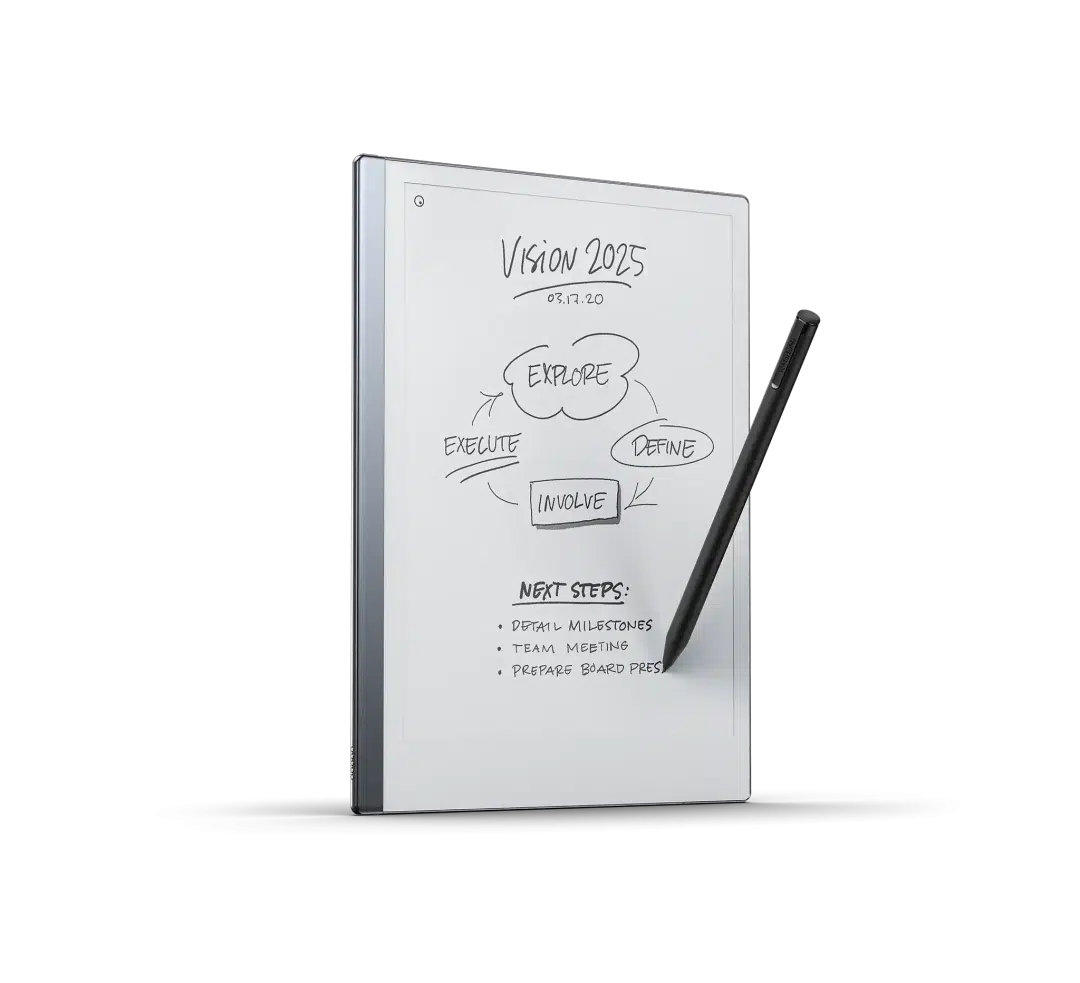
Source: Remarkable.com
AI Generated Storyboard Scenes
We’re just starting to see AI’s that are created for the specific purpose of creating storyboards. They tend to fall into two categories:
1). AI’s that suggest content for your storyboard
These AIs can read a script and take in information about your target audience and then suggest ideas for what to show for each part of your script. This is a great way to get ideas for scenes that are difficult to visualize.
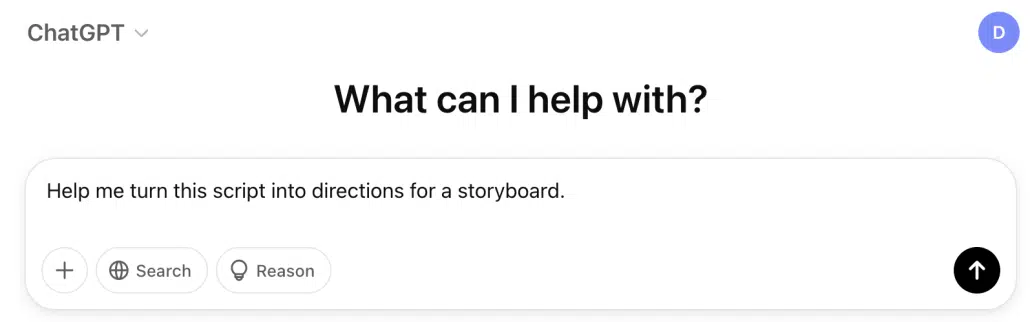
2). AI’s that create sketches for your storyboard
Other AIs are capable of taking your script and generating sketches for each scene in your storyboard. Customization abilities are limited but you can ask the AI to keep regenerating new suggestions until it comes up with something that’s close enough.
How to Create a Professional Storyboard for an Animated Video
Creating a storyboard for an animated video is more than putting a few sketches on a page. A good storyboard should function as a visual blueprint for the entire production. It should help everyone involved understand what the viewer will see, what they will hear, what happens next, and which artwork needs to be created.
The best storyboards also make it easier to identify problems before animation begins. It is much less expensive and time-consuming to change a storyboard than to discover after several days of animation that a scene doesn’t communicate the intended idea.
Here is a practical process you can use to create a storyboard for an animated video.
1. Start With the Final Script

The storyboard should generally be created after the script has been developed far enough that the major ideas and voiceover are unlikely to change.
Start by breaking the script into individual beats. A sentence does not necessarily equal one scene. Some sentences can be communicated with a single visual, while other sentences may require several visual changes.
For example, imagine the voiceover says:
“Every morning, your sales team spends hours searching through spreadsheets, emails, and different software platforms just to find the information they need.”
That sentence could potentially become several storyboard panels:
- A salesperson opens a spreadsheet.
- The salesperson switches to email.
- They search through another application.
- Multiple windows begin piling up around them.
- The information finally comes together in one platform.
The purpose of storyboarding is not to force every sentence into exactly one picture. The purpose is to determine how the visual story should unfold while the audience hears the narration.
2. Identify the Visual Idea for Every Major Beat

Before drawing anything, go through the script and identify the main visual idea for each section.
Ask:
What should the viewer see while this information is being communicated?
There are several common ways to visualize information in an animated video:
- Character action
- Product demonstration
- Screen recording or UI animation
- Diagrams
- Charts and graphs
- Icons and symbols
- Text animation
- Visual metaphors
- Before-and-after comparisons
- Environmental changes
- Camera movement
- Transitions between scenes
Try to choose the visual approach that communicates the idea most quickly.
For example, if the script says that a company is growing rapidly, you could simply display the words “rapid growth.” A stronger animation might show a small storefront transforming into a large operation, with additional employees, customers, locations, or revenue charts appearing around it.
The second approach gives the animator something to build and gives the viewer something to understand visually.
3. Create a Thumbnail Version First
You don’t have to begin by creating polished artwork.
In fact, it is often better to start with extremely rough thumbnail sketches.
Draw small boxes representing the major shots in your video. Use simple shapes to indicate characters, objects, text, and important visual elements.
At this stage, don’t worry about making the drawings attractive.
You are trying to answer questions such as:
- Does the story make sense?
- Is the sequence easy to follow?
- Does the visual change when the message changes?
- Are there too many scenes?
- Are there sections where nothing visually interesting happens?
- Does the ending build naturally toward the CTA?
A rough storyboard makes these problems much easier to identify.
This is especially useful because animation can involve significant design and production work. Solving a storytelling problem while the storyboard consists of rough sketches is considerably easier than solving it after the artwork has been designed and animated.
4. Establish a Consistent Visual Style
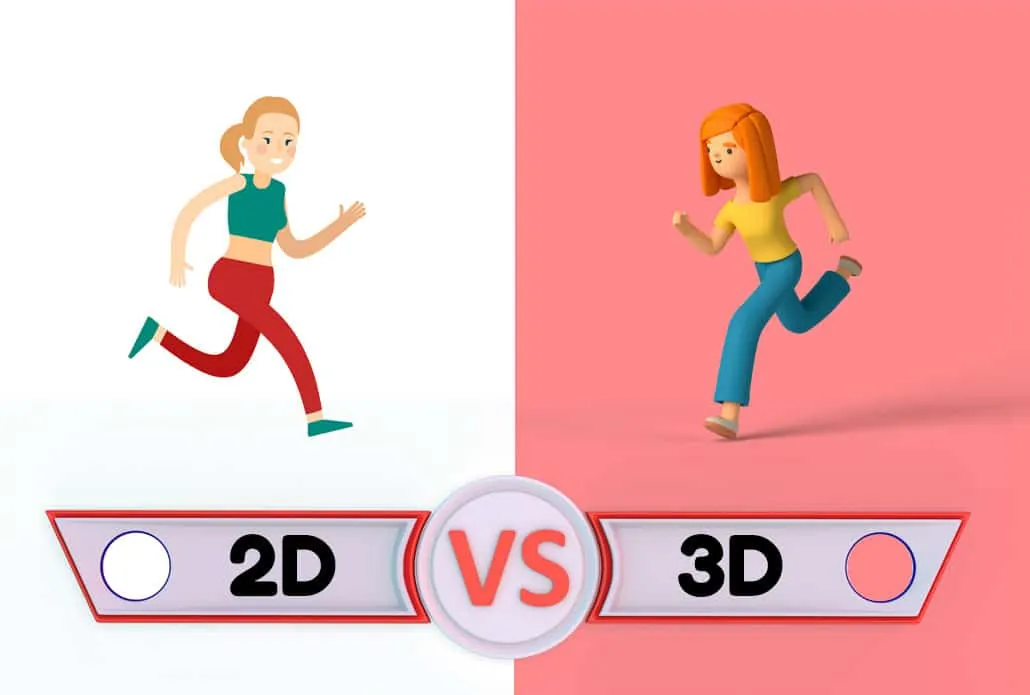
Before developing every storyboard frame, establish the general visual language of the video.
Your storyboard does not necessarily need finished artwork, but it should communicate the intended style.
Consider:
- Character design
- Color palette
- Typography
- Illustration style
- Background treatment
- Level of detail
- Icon style
- UI treatment
- Camera perspective
- Use of texture
- Overall visual tone
For example, a technology explainer might use clean geometric illustrations, simple backgrounds, interface graphics, and restrained character animation.
A brand campaign might require a more distinctive illustration style with custom characters, unusual compositions, and more elaborate transitions.
Creating a small style reference or mood board before completing the storyboard can help prevent the visual direction from changing from scene to scene.
5. Think About Continuity

Continuity is one of the easiest things to overlook when creating an animated video storyboard.
If a character is holding a coffee cup in one scene and the next scene continues the same action, the cup should not suddenly disappear unless there is an intentional reason for it.
The same applies to:
- Character positions
- Clothing
- Props
- Screen interfaces
- Backgrounds
- Lighting
- Object locations
- Character scale
- Direction of movement
Continuity becomes particularly important when a story follows a character through several scenes.
Create a simple asset and character reference sheet if your animation includes recurring characters or environments. Record details such as clothing, colors, accessories, important props, and other characteristics that should remain consistent throughout the video.
6. Plan Camera Movement in the Storyboard
Animation gives you much more freedom with the camera than many people realize.
Your storyboard can indicate whether the camera should:
- Zoom in
- Zoom out
- Pan
- Track a character
- Rotate
- Transition between environments
- Move from a wide shot to a close-up
- Follow an object
- Move through a user interface
- Remain completely static
You don’t need to use camera movement simply because you can.
Camera movement should have a purpose.
For example, a zoom-in can direct attention toward an important detail. A camera pan can reveal additional information. A transition from a wide shot to a close-up can signal that the story is moving from a general concept to a specific example.
In a storyboard, a few arrows and a short note can communicate the intended movement.
For example:
Camera: Slowly zoom toward the dashboard as the narrator explains the three key metrics.
This is usually more useful than attempting to draw every intermediate frame.
7. Show What Moves, Not Every Frame of Motion

A storyboard is not normally a frame-by-frame animation.
You do not need to draw every position a character’s arm will occupy during a movement.
Instead, show the important poses or key moments.
If a character walks across the screen, for example, you might show:
Panel 1: Character begins walking.
Panel 2: Character arrives at the destination.
Then use your direction notes to explain that the character walks from left to right between those panels.
For more complicated animation, additional storyboard panels can be useful. A character jumping, transforming, interacting with a complicated interface, or performing a specific action may require several key poses.
The level of detail should correspond to the complexity of the animation.
What Should Be Included in an Animated Video Storyboard?

A useful storyboard should answer the production team’s most important questions without requiring them to guess.
At a minimum, include:
Scene or Panel Number
Number every panel sequentially.
This makes it much easier to discuss revisions.
Instead of saying, “Can we change the part where the character is standing next to the computer?” a client can say, “Can we revise Scene 14?”
Voiceover or Dialogue
Include the exact portion of the script associated with the panel.
This establishes the relationship between the visual and the narration.
Visual Reference
Include a sketch, mockup, screenshot, photograph, icon, or other visual reference.
It doesn’t have to be beautiful. Its job is to communicate the concept.
Animation Direction
Describe what moves and when.
Keep these instructions concise and specific.
For example:
- Character enters from the left.
- Screen expands to fill the frame.
- Three icons appear one at a time.
- When the narrator says “automatically,” the three manual steps disappear.
- Camera zooms into the dashboard.
Assets
List the artwork or materials required for the scene.
This might include:
- Character
- Background
- Laptop
- Smartphone
- Logo
- UI screen
- Chart
- Icons
- Stock footage
- Sound effects
- Music
- Photographs
A detailed asset list can save time later because the production team can identify what needs to be created before animation begins.
On-Screen Text
If text will appear in the animation, include it in the storyboard.
This includes:
- Headlines
- Labels
- Statistics
- Captions
- Buttons
- Product names
- Calls to action
Avoid assuming that the animator will decide what text should appear later. If the wording is important to the message, it belongs in the storyboard.
How Detailed Should an Animation Storyboard Be?

There is no single correct level of storyboard detail.
A simple motion graphics video may only need rough frames showing the major compositions and transitions.
A character-heavy animation may require more detailed drawings showing poses, expressions, interactions, and environments.
A complicated 3D animation may require even more planning because camera angles, environments, object placement, and movement can be significantly more involved.
A useful rule is:
The storyboard should be detailed enough that another person can understand what needs to happen without asking you to explain every scene verbally.
If your animator can look at the storyboard and understand the intended action, it is probably detailed enough.
If the animator has to ask questions such as “Where does the character go?” “What happens next?” or “Which screen are we showing?” then the storyboard probably needs more information.
At the same time, avoid turning the storyboard into an attempt to pre-animate the entire project. Leave room for the animation team to solve visual and motion-design problems creatively.
How to Storyboard a 60-Second Animated Video

A 60-second animated video can contain a surprisingly large amount of visual information.
If the voiceover contains approximately 125–150 words, you may have several distinct visual beats within those 60 seconds.
A simple structure might look like:
0:00–0:05 — Hook
Introduce the problem with a visually interesting situation.
0:05–0:15 — Problem
Show the audience what is frustrating, inefficient, confusing, expensive, or otherwise undesirable about the current situation.
0:15–0:25 — Solution
Introduce the product or idea that changes the situation.
0:25–0:45 — Benefits
Demonstrate the two or three most important benefits.
0:45–0:53 — Proof
Show a result, statistic, customer example, or other evidence.
0:53–1:00 — CTA
Summarize the value proposition and show the viewer what to do next.
This is only a starting point. The storyboard should ultimately follow the needs of the story rather than forcing every video into exactly the same structure.
How to Review an Animated Video Storyboard Before Animation

Before approving a storyboard, watch it as though you have never heard the company’s pitch before.
Go panel by panel and ask:
Can I understand the story from the visuals alone?
You shouldn’t necessarily be able to understand every detail without the voiceover, but the major narrative should be apparent.
Then review the storyboard together with the script.
Ask:
Do the visuals reinforce what the narrator is saying?
If the narrator says one thing while the animation shows something unrelated, the audience has to process two competing messages.
Finally, look at the pacing.
Ask:
- Does the visual change when the topic changes?
- Are any scenes on screen for too long?
- Are there too many visual changes happening at once?
- Does the most important information receive enough visual emphasis?
- Does the ending feel rushed?
- Is there enough time for the audience to understand important graphics or text?
These questions can reveal problems that aren’t obvious when reading the script alone.
Common Storyboarding Mistakes to Avoid

Making the Storyboard Too Detailed Too Early
Don’t spend hours creating polished artwork before you know whether the overall sequence works.
Start rough and refine the visuals after the storytelling is working.
Creating Visuals That Simply Repeat the Voiceover
If the narrator says, “Our software saves time,” and the screen displays the words “Saves Time,” you’re not taking full advantage of animation.
Whenever possible, demonstrate the benefit visually.
Show the old process taking five steps and the new process taking two.
Trying to Animate Every Word
Not every word requires a visual change.
Constant movement can actually make an animation harder to understand.
Give important visual ideas enough time to register.
Including Too Much Information
A storyboard can expose a problem that was hidden in the script: there is simply too much to communicate.
If every scene contains a new feature, statistic, character, chart, and text element, the audience may have difficulty determining what matters.
Simplify.
Forgetting About the Transition Between Scenes
A storyboard should explain not only what happens inside individual scenes but also how the video moves from one idea to the next.
Some transitions can be simple cuts. Others can use an object, character, camera movement, or visual metaphor to connect two ideas.
A strong transition can make an animated video feel like one continuous story rather than a collection of unrelated slides.
Storyboard vs. Animatic: What’s the Difference?
A storyboard is a visual plan for the animation. An animatic takes those storyboard images and puts them into motion with approximate timing.
A storyboard answers:
“What should happen?”
An animatic helps answer:
“How long should it take, and does the sequence work when viewed as a video?”
This distinction is important because a storyboard can look excellent as a collection of individual images while still having pacing problems when played sequentially.
For example, a joke may look funny in a storyboard panel but fail because the reaction happens too quickly.
A product demonstration may look clear in several individual frames but become confusing when the transitions happen too rapidly.
An animatic gives the production team an opportunity to discover those problems before expensive final animation begins.
Using AI to Create an Animated Video Storyboard

AI can now be useful for generating storyboard ideas, visual references, rough compositions, and alternative scene concepts.
For example, you can provide an AI tool with a script and ask it to suggest several visual approaches for each section.
This can be especially helpful when you know what you want to say but aren’t sure how to visualize an abstract concept.
However, AI-generated storyboard images should generally be treated as references rather than automatically approved final designs.
AI-generated images can introduce problems with:
- Character consistency
- Object continuity
- Screen interfaces
- Brand accuracy
- Typography
- Perspective
- Repeated characters
- Product details
For an animated video, consistency between scenes matters. If a character’s appearance changes from one panel to another, or a product interface looks different in every frame, the storyboard may become less useful as a production reference.
A practical workflow is to use AI for ideation, then refine the strongest ideas into a consistent storyboard that reflects the actual production requirements.
The same principle applies to AI-generated content generally: the technology is most useful when it helps a creative team produce something more useful and original, rather than simply generating generic material at scale.
A Simple Animated Video Storyboard Template

If you are creating your first storyboard, use this basic structure for every scene:
SCENE #:
VOICEOVER:
What does the audience hear?
VISUAL:
What does the audience see?
ANIMATION/DIRECTION:
What moves? What happens first, second, and third?
ON-SCREEN TEXT:
What words appear on screen?
ASSETS:
What characters, backgrounds, objects, graphics, screenshots, or other materials are required?
NOTES/REFERENCES:
Are there examples, screenshots, links, or additional instructions the animator should see?
For example:
SCENE 08
Voiceover:
“Now your entire team can see the status of every project in one place.”
Visual:
Show the company’s dashboard filling the screen. Several project cards appear in different stages.
Animation/Direction:
- Dashboard slides into view.
- Project cards populate one at a time.
- Camera moves toward the three project-status columns.
- Completed projects move into the “Done” column.
On-Screen Text:
“Every project. One place.”
Assets:
Dashboard UI, six project cards, company logo.
Notes:
Use the attached product screenshot as the visual reference for the dashboard layout.
This format gives an animator, designer, client, or other stakeholder enough information to understand the intended scene without requiring the storyboard creator to be an artist.
Final Storyboard Review Checklist

Before sending your storyboard to an animation team, review the following:
- The script is approved or close to final.
- Every major script beat has a corresponding visual.
- Every scene is numbered.
- The visual concept is clear.
- Animation direction is included where necessary.
- Required assets are identified.
- Important on-screen text is included.
- Characters and recurring objects remain visually consistent.
- Camera movements are identified when important.
- Transitions between major ideas are understandable.
- The pacing works for the intended runtime.
- The CTA has enough time to be understood.
- References and screenshots are attached where needed.
- The storyboard has been reviewed by someone who understands the target audience.
- Major creative questions have been resolved before animation begins.
The goal of a storyboard isn’t to create beautiful drawings. The goal is to remove ambiguity before production starts.
A rough storyboard with clear visual ideas, timing, direction, and asset requirements can be far more useful than a beautifully illustrated storyboard that doesn’t explain how the animation should work.
When you create a storyboard for an animated video with that goal in mind, you give your animation team a much stronger blueprint—and you dramatically improve the chances that the finished animation will communicate the original idea the way you intended.
What Is An Animatic?
Some animated video projects require the creation of an animatic in addition to the storyboard. An animatic is halfway between a storyboard and the final animation. Storyboard sketches are synced up with the timing of your voiceover to create a very rough version of your video. Often times, additional images are sketched for inclusion in the animatic.
The purpose of the animatic is to create a rough timing of the animation so that everyone involved with the project can see how the timing / pacing of the visuals lines up with the pace of the voiceover. It’s helpful for identifying ‘dead’ portions of the video where very little motion is happening. It’s also useful for planning and choreographing detailed and nuanced parts of your animation to ensure the timing is right. If your animation is very detailed, it’s useful to create an animatic first to ensure your video is created properly the first time. Animatics are also useful for testing the comedic timing of jokes.
Animatics are frequently created for 3D animation projects and hand drawn animations. Standard 2D computer animation projects usually don’t require the creation of an animatic.
Here’s an example of an animatic. Below that is the video that was created from the animatic.

Still have questions about how to create a storyboard for an animated video?
Do you have a question about how to create a storyboard that wasn’t addressed in this FAQ? Use this form to send us your question and we’ll follow up with an answer. We’ll also post the question and answer to this page so other people can benefit from the knowledge.

What is Video Igniter Animation?
Video Igniter Animation is an online animated video production service. By working with our team online, you can get your custom animated video produced faster and for less than hiring a brick and mortar animation studio.
We can help you create any kind of 2D animated video or 3D animation you can imagine. Check out our animated video portfolio!
Want to know more about the production process? Learn how to make a video animation.
Watch our explainer video on our home page to learn more about how we can help you create an animated video. For examples of the kinds of animation our team can produce, check out the demo reel below:
Looking For An Animation Studio In The U.S.?
Video Igniter is headquartered in Seattle, Washington.
Success Stories & Testimonials
Don’t just take our word for it – these testimonials highlight Video Igniter’s reliability, creativity, flexibility and ability to deliver animations that exceed expectations. When you choose Video Igniter to help you make video animations, you can rest assured that you are working with a trusted and reputable studio.
“Video Igniter were very easy to work with and the entire process for creating and suggesting edits was seamless and stress-free. I would work with them again and would recommend to others looking to create a modern and stylish explainer video.”
Clair Simpson – VP Marketing, Repool.com
“I run a video production company and outsource animation. The team at Video Igniter did a great job in taking the concept I very crudely drew out and making it into a beautiful animation. The review process was easy and their turnaround time was very quick. I’d def recommend them if you’re looking for an animation project.”
Pat Henderson – Founder, Path8 Productions
“Video Igniter offered us the critical combination of creative value, clear communication, and patience with stakeholder feedback. We ended up with truly high-quality design assets for our video series largely due to the extra level of commitment — and the right balance of efficiencies with flexibility in the process when called for.”
Larry Schlessinger – Sr. Creative Program Manager, Amazon Web Services
“Video Igniter came to us with a number of creative and engaging ideas and were able to create an exciting, impactful video in a short period of time. And the best part was that it cost much less than other options of similar quality. The video they made is a great marketing tool for us.”
Alex Raymond – Founder, Kapta Systems
“I am beyond satisfied with my experience with Video Igniter. The first drafts of the work were almost exactly what I had in my head when developing the concept. After that each step along the way was seamless until arriving at a perfect finished product. And all this at a tremendous value. Anyone who has considered creating a marketing video should check out Video Igniter.”
Anonymous Customer Feedback

Need help creating your storyboard? Get in touch!
Schedule a call to discuss your animated video project.
Get a quote for us to create your animated video.
Request access to our newest price sheet.
Create your Video Igniter account, fill out a creative brief for your video and we’ll begin production as soon as we receive your production deposit.